

This little mermaid thinks you're wonderful and wants you to have a Fin-tastic birthday!
Featuring a Kraftin' Kimie Stamps mermaid, an Emerald Creek stamp in the background, Distress ink watercolouring, Pretty Pink Posh droplets and shells, this tri-fold card holds lots of fin-tastic smiles.


Supplies


First of all, let me apologise for the lighting. One of my 'daylight' lamps burned out and left me with half as much 'white' light from the front of my table as I normally have. When taking the final pictures I usually turn off the other florescent lights to leave just the 'daylight' ones, but I could not do that this time. The light balance in the process pictures is off, too, because of the missing light. I'll need to get a new bulb (with some more spares) this weekend. I still need better lighting over all in my workshop instead of my motley set up, but I need to do the re-arrange first.
Enough about lighting, there was a mermaid on my table for a couple days.

I stamped Serena with a light brown. I use Memento dye ink because, although it is water-based, it dried water impervious making it ideal for working with water medium. To colour/paint the images in this project I used Distress ink with waterbrush.

I started Serena with Tumbled Glass as the base for her skin. I wanted to have a slightly blue undertone. For shadowing, I used Victorian Velvet.

The final colour for her skin is Tattered Rose. I think it's a great caucasian skin colour and use it often with the very light blue of Tumbled Glass, the light pink Spun Sugar for a more baby/youthful colour, Antique Linen for an older adult, Tea Dye for a lightly tanned skin, and Old Paper for an olivine skin tone.

I was thinking about making her hair raven with highlights in blues, so I used the Tumbled Glass to start her hair, too.

And then I changed my mind and went with blues for her hair. I used Faded Jeans, Broken China, Mermaid Lagoon (fitting *grin*), and Chipped Sapphire. For her tail, I started with Broken China and was intending to go more blue-y green. I used Iced Spruce for the shadowing on this part of her tail.

Using Evergreen Bough, I painted scales with quick U swipes. I then used a Gelly Metallic pen over the scallop U's for a bit of glimmer.

For the fins, I intended to have them more distinct from the tail but the Glaze pen I wanted to use wasn't scribbling colour so I went with a darker metallic than the tail scales. The tail is not as much of a colour change from the fins as I was hoping but still looks lovely.
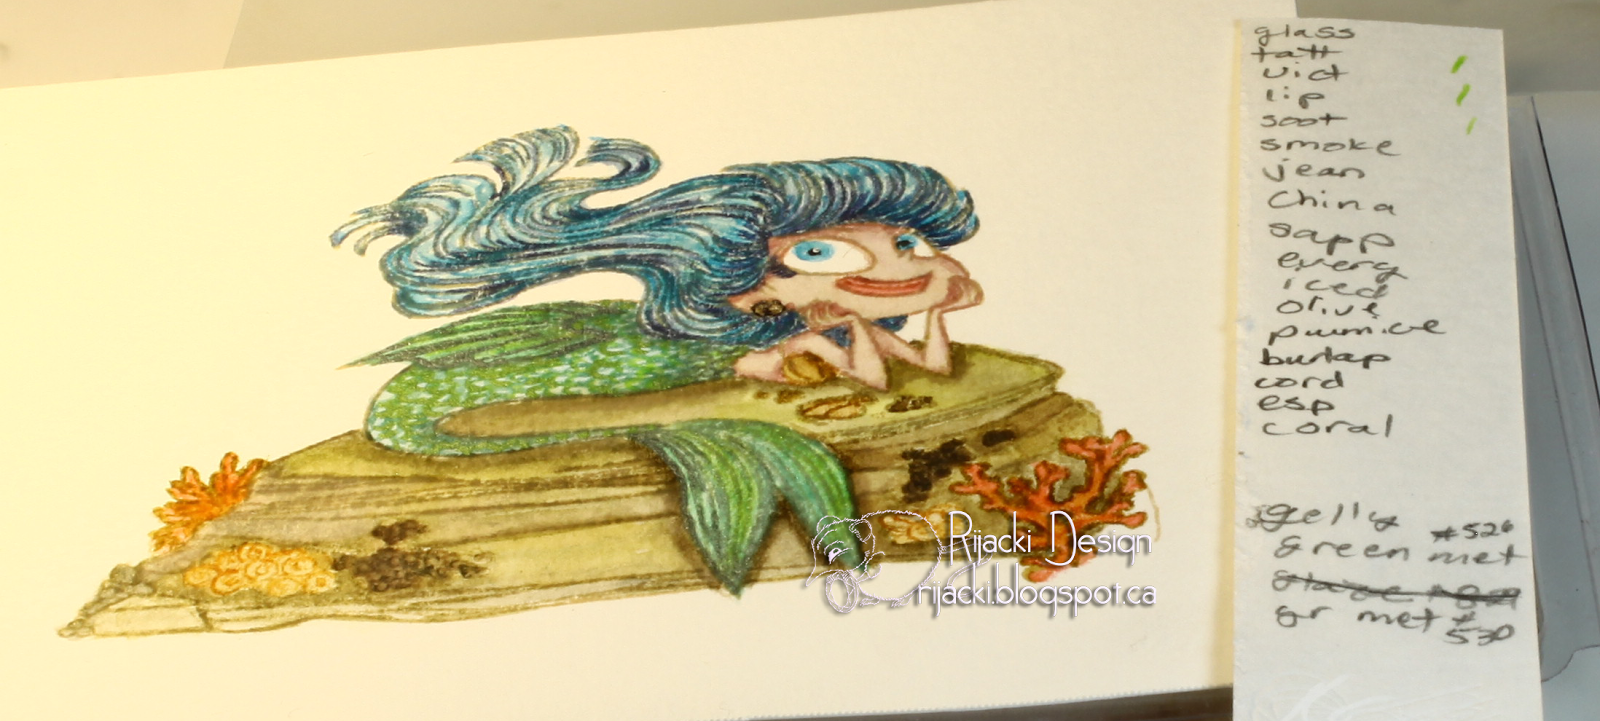
I try to keep a tally of what I use while I am painting/colouring but sometimes miss a colour or two. It's real hard to remember the layers of colours unless it's something like Mermaid Lagoon in the mermaid's hair.

I fussy cut Serena but missed the tiny spot under her chin between her arm and hair. I thought I had, because I intended to, but didn't realise I hadn't until I was writing this bit. *laugh*

Using scrap from Serena, I stamped and coloure/painted a water logged piling from Emerald Creek. I thought it would be perfect to build her background. I stamped with a dark brown and then painted with Distress ink and waterbrush, of course. Stamping with a dark brown, I was able to use the stamping for the craggly lines and just enhance the shadowing.

I started pondering a layout and dragged out my bag-o-shells. When doing a dry fit like this, I will use a panel cut to 5 1/2" x 4 1/4" which is the dimensions of an A2 card, the easiest card size to mail. I generally use this card size unless the project demands bigger.
As it was past 11pm, I stopped at this point and went to bed. I kept pondering the project as I was at work the next day. I was thinking about doing it as a shadow box and then got the idea of doing a tri-fold with the front panels angling down. I was thinking of embossing and all sorts of ideas, even pondering clear panels.

So... since I had pretty much stuck myself with the idea of a tri-fold, I tried some different papers. The clear mylar panel I thought of was the wrong colour, or at least what I currently have in my stash is the wrong colour. I had the right colour in the past and didn't replenish it. So... none of my 12" x 12" cardstocks were enthralling me and I couldn't find another one I thought would work wonderfully (it's hiding in my stash but in the end I am glad it hid). I looked at my 8 1/2" x 11" solids and this blue slotted in to my mental image.
I cut a strip 5 1/2" by 11", the longest I could. Since I wanted an A2 card, that meant the back, the inside or middle panel would need to be 4 1/4" wide. That leaves 6 3/4" of 11" (even with a 12" x 12", the front flaps would not be a full 4 1/4"). I wanted the front longer than the second flap. I scored at points I thought would make a good fold over and promptly forgot to write them down *laugh*. I then cut each of the flaps at an angle but not all the way to a bottom point. If I had actually bothered to do math, I could have gotten the opening more even, but I was thinking more where the mermaid was than the opening. I was actually surprised I got it this close to even when I hadn't been specifically trying to.

I knew I wanted to have coloured panels over the card base. I used a blender on Elizabeth Craft Designs soft finish white cardstock. I love blending on this particular cardstock. It has a very subtle pebble texture and it just blends beautifully.

After I oceaned the panels, I did a dry fit without the card base. I was loving how it was coming together.

I added the panels to the card base and was annoyed when it didn't line up so I trimmed the front panel and recoloured the edge. I had thought of other ways sot cover/disguise the edge but none fit in my mental image of how the card should look in the end.

I did a dry fit in the Misti to get the placement of the sentiment. Behind Serena is the bar magnet I bought to replace the little round ones. (of which I have broken 5!)

Serena is popped up with foam mounting tape, the rest of the paper elements are adhered directly with Tombow runner. The shells are attached with mini Glue Dots and the Pretty Pink Posh droplets with Multi-Medium matte. I added in some of the small items on the inside panels from the stamp set Oceans of Love to give a bit of extra detail hidden behind the mermaid. I like adding in extra touches inside.


Challenges
Kraftin' Kimmie Stamps: Mermaids
Seize the Birthday: Anything Goes
Emerald Creek: Surf and Turf
Addicted to Stamps and More: Make Your Mark
Through the Craftroom Door: Anything Goes
Wonderful punny sentiment.
ReplyDeleteThanks for making your mark at ATSM. :)
What a great card. Love your layout. It's perfect for this. Thank you so much for entering our ATG challenge at Through The Craft Room Door this week. Looking forward to see you again next challenge.
ReplyDeleteRegards,
Ann-Marie
TTCRD DT
Annemi {My Blog}
Through The Craft Room Door
ttcrd.blogspot.com
This is so fun! Love the cool card design and the fabulous colouring. Thanks for playing along with Seize the Birthday.
ReplyDelete